ShopDreamUp AI ArtDreamUp
Deviation Actions


Description
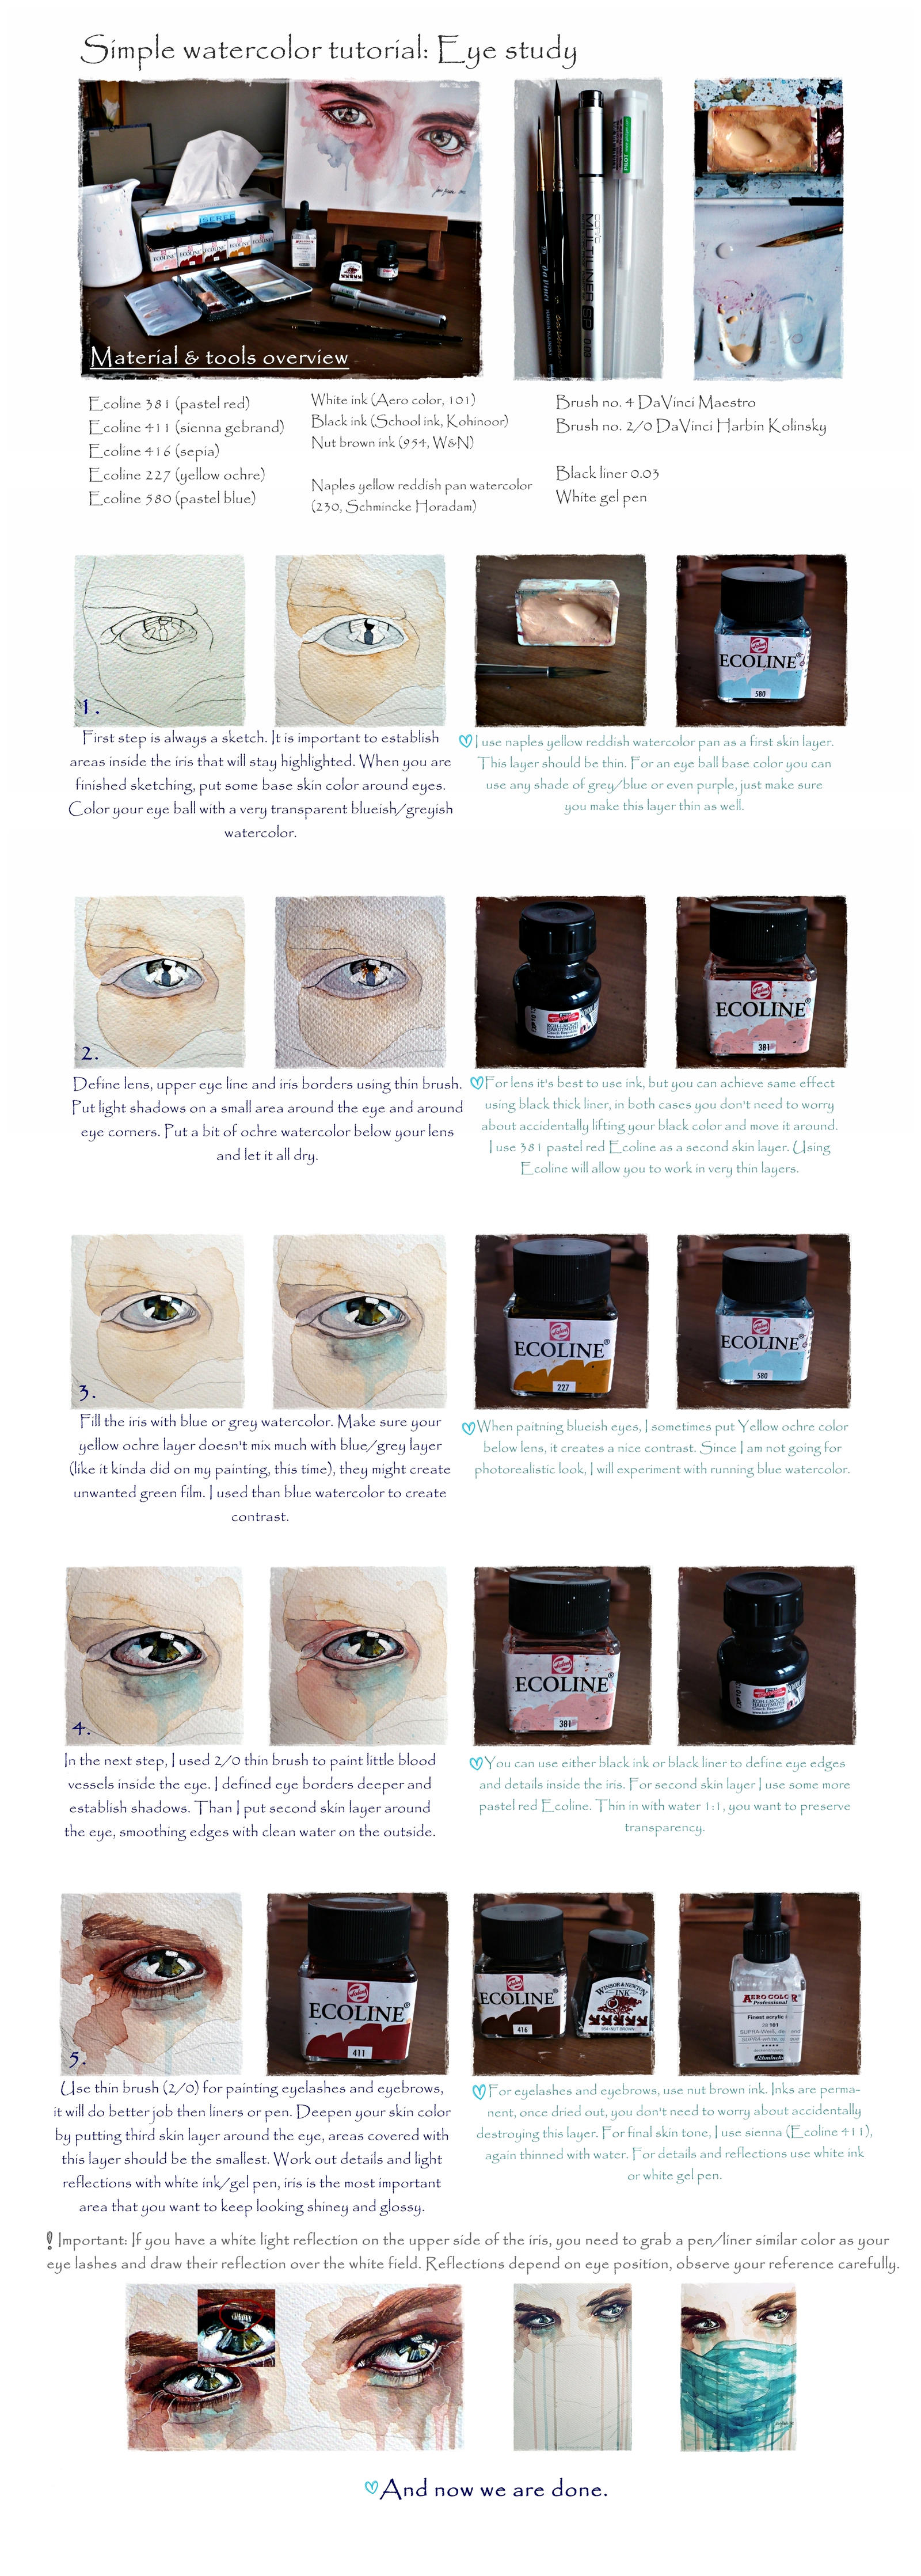
This is a watercolor tutorial focused on painting a single eye step by step (as requested). I explained what exact materials and tools I used for this painting. If you have any questions, suggestions or this tutorial isn't comprehensive enough / missing anything important, comment here or note me - I will gladly answer and help you as much as I can to make this kind of technique comprehensive for aspiring watercolorists.
Please note that this might not be the most perfect or proper way of how to approach watercolor painting, it is merely an explanation how I worked.
 Final painting (it's two versions):


>>> Society6 | |
|  | tumblr <<<
Please note that this might not be the most perfect or proper way of how to approach watercolor painting, it is merely an explanation how I worked.
For painting videos see my YouTube channel
>>> Society6 |
Image size
2446x6841px 6.9 MB
© 2012 - 2024 jane-beata
Comments70
Join the community to add your comment. Already a deviant? Log In
Wonderful! This was very helpful and contained more comprehensive material than your last tutorial. Unlike the last tutorial which only showed photo step by step, the commentary was very helpful in explaining exactly what you did between steps. The tutorial showing only the photos step by step was helpful in seeing the process but some of the steps in between were confusing on what exactly you did. This was a much better improvement in showing speficially what details you did with the eye and hilighted the important aspects and also pointed out steps that we may have missed or overlooked with the last tutorial. I like how you showed what exact materials you used for each step, that solves a lot of unanswered questions and shows us exactly what you used so we can use either the same or similiar materials. This is a much better version, thanks for the tutorial. <img src="e.deviantart.net/emoticons/s/s…" width="15" height="15" alt="